Pirsonal is a flexible marketing automation software focused on multimedia personalization so organizations can engage with their saturated audiences at scale with highly relevant unique content that makes them react.
One of the key characteristics of Pirsonal’s personalization software is that it automatically creates personalized videos, dynamic landing pages, and adds trigger-based personalized Calls to Action to your marketing videos at scale.
Since we understand your audience’s desire for relevancy, every single piece of content automatically created by the Pirsonal marketing automation software can be personalized and customized based on your data.
From the Calls to Action delivered by Pirsonal’s interactive video player to the more obvious content of the personalized videos, including images, audios, text, and video clips.
At Pirsonal, we understand that today’s marketing is a conversation that happens in real-time. Organizations use many marketing and customer engagement tools that speak to each other.
Because of this, Pirsonal offers thousands of integrations through Zapier. Zapier is a platform that moves data between applications, no coding is required.
This article explains how to use the Pirsonal app with Zapier so that you can do this in no time no matter your expertise. Learn how to connect your Zapier account to your Pirsonal integration and more.
You'll learn...
Things you should know before you start
- If you don’t have a Zapier account, please go ahead and create one.
- Pirsonal’s Zapier app is not an app available to the general public yet. Because of this, you will not find it in Zapier’s App Directory until our product team makes it globally available. In this article, you’ll learn how to activate your invitation.
- The Pirsonal Zapier app is available to all plans at no cost.
- The Pirsonal app within Zapier can be used in the Trigger and Action sections or steps. Below you’ll learn how this can help you create full automation workflows with personalization.
- If for any reason Zapier is not a good fit for you, use Pirsonal’s API or Integromat or let us know and we’ll be happy to advise what will work better based on your goals.
Pirsonal on Zapier: Flexible Marketing Automation Software
The first step to implementing Zapier with Pirsonal is to activate your invitation.
When you click on the link above you will see the following page:
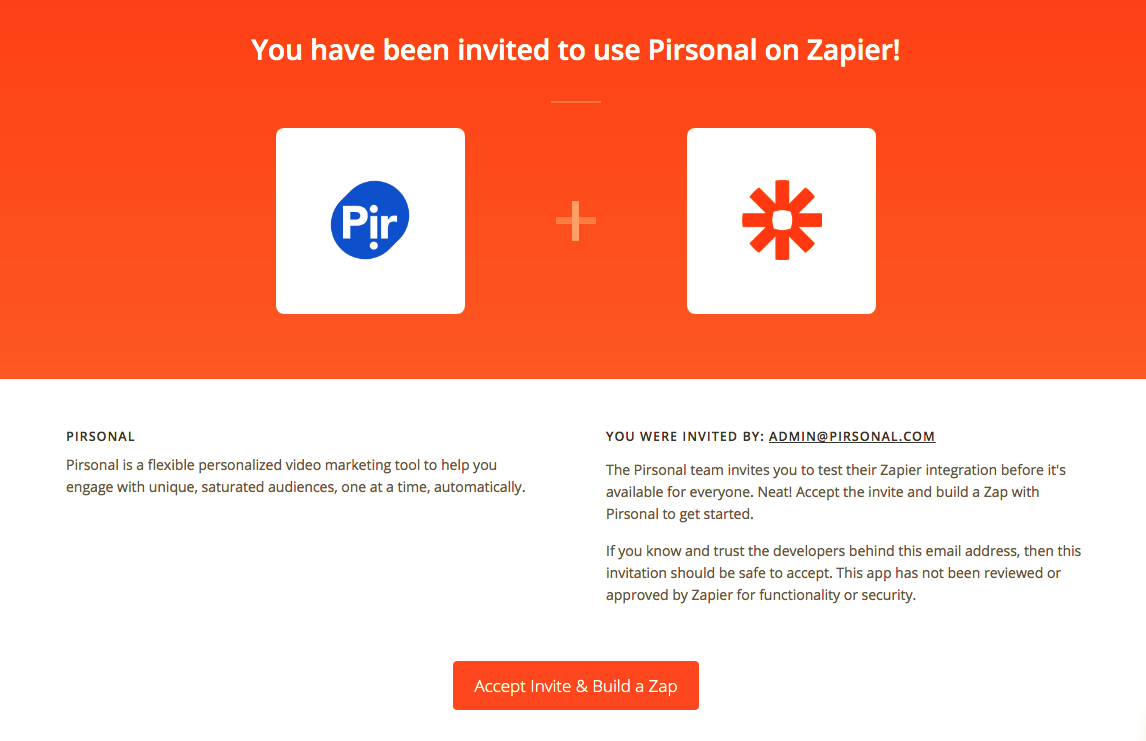
The Pirsonal Zapier App Invite Splash Screen
Simply click on the orange button “Accept Invite & Build a Zap” to gain access to the Pirsonal Zapier app.
Creating Zaps
Once you have properly accepted the App invite, you can now start integrating with thousands of services to automatically create data-driven personalized videos, dynamic landing pages, and interactive video Calls to Action powered by favorite marketing tools.
If you are a new Zapier user, please read up on triggers and actions.
For example, let’s create a Google Sheets integration with Pirsonal.
The following video explains how to create personalized videos, interactive videos with personalized Calls to Action, and landing pages with personalized content with data coming from a spreadsheet.
Let’s go step by step.
To connect Google Sheets with Pirsonal to automatically create personalized content, you’ll need to create a new Zap.
For this, click on the “Create Zap” button.
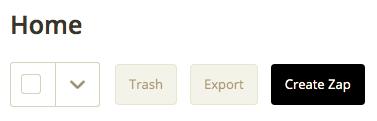
Button to create a new Zap
Then you’ll be taken to the Zap editor. In the Zap editor, you’ll set up a trigger and at least one action. As you’ll see, the concept is the following:
- When this happens (trigger)
- Then do that (action)
Trigger to Send Data to Pirsonal
When creating automation with Pirsonal, the primary trigger will usually be your data source. For example, Google Sheets, Mailchimp, or Hubspot. Through Zapier, you can easily connect with Pirsonal with thousands of marketing automation software.
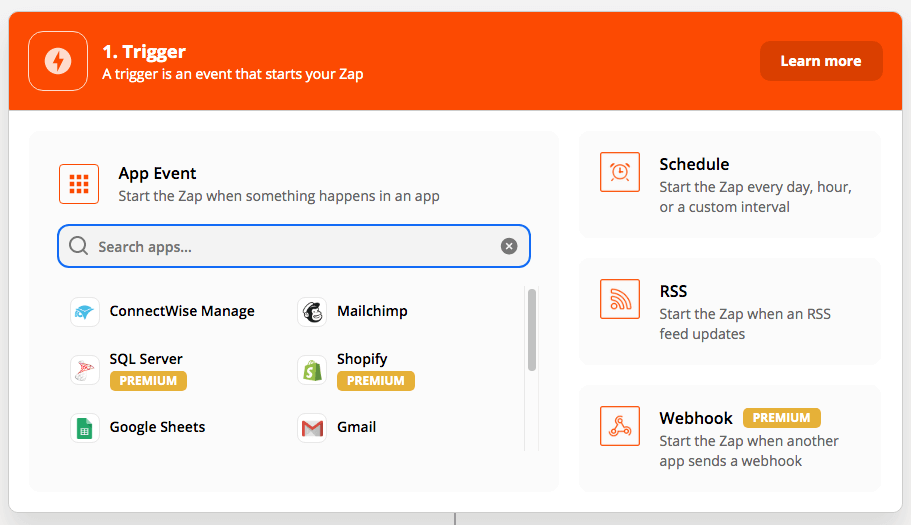
Zapier Editor’s first step: Trigger
For this example, I’ll select Google Sheets as the trigger app or app event. This means that the zap will be executed whenever something happens in Google Sheets.
In general terms, simply follow the steps requested by the app you choose in Zapier.
Now, you’ll be asked to select a trigger for the app you’ve chosen.
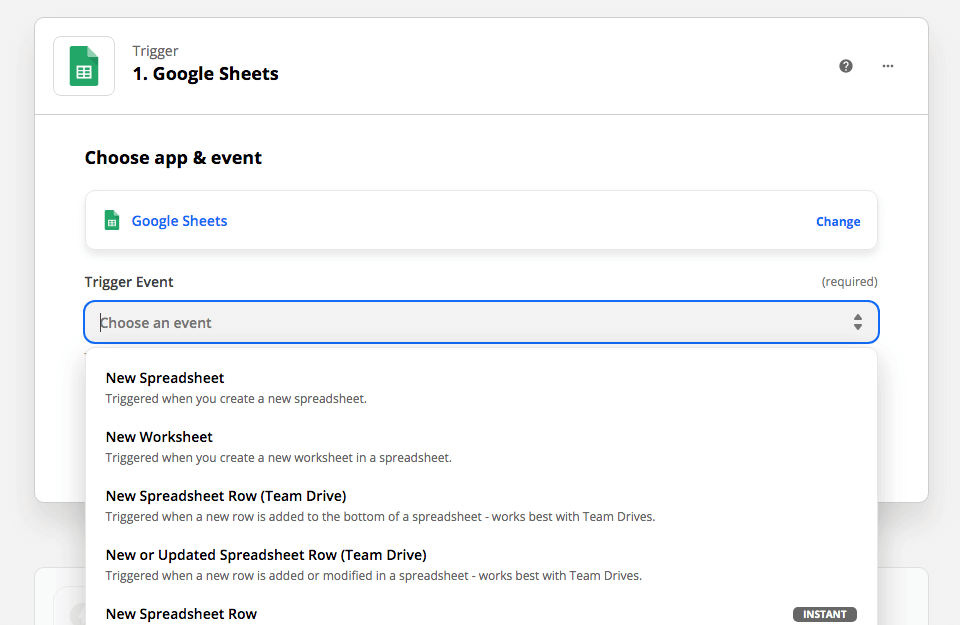
In the app event, choose a trigger
I’ll choose “New Spreadsheet Row”. This means that whenever a new spreadsheet row is added to a specific Google Sheets document, this Zap will be triggered.
Once you have selected what will trigger this Zap, it’s time to choose your account. Each application will provide the steps required.
Now, set up the trigger. The following image shows how to set up the trigger using Google Sheet.
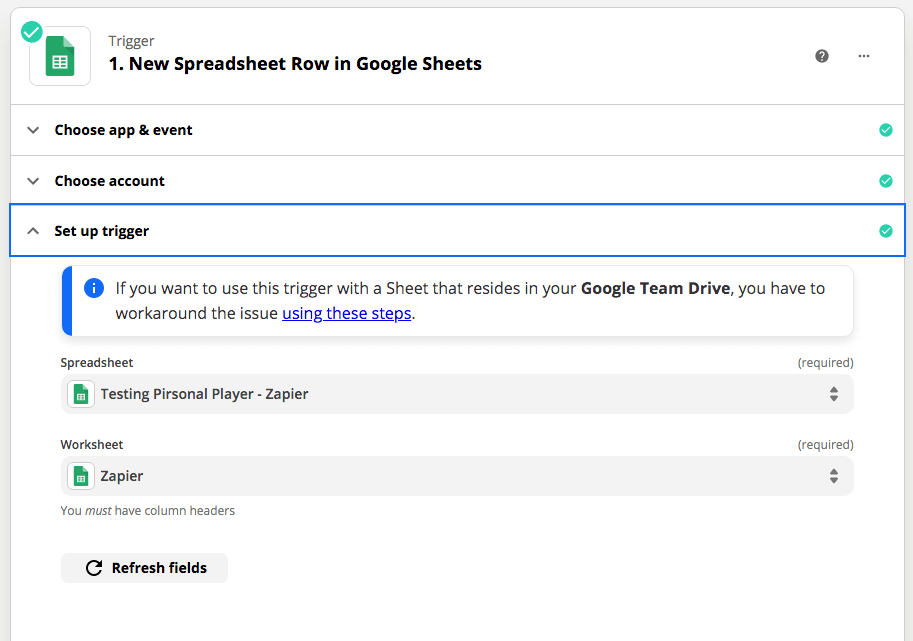
Trigger Example With Google Sheets
As shown in the image below, the last step for any trigger section is a test.
This test helps you double-check if the data retrieved from your data source (in this example, Google Sheets) is the right one. This data will be used by the Action app in the following sections.
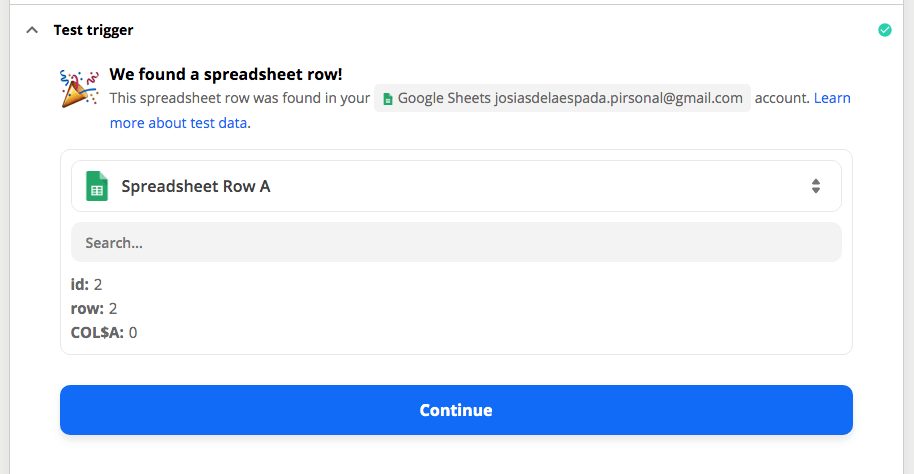
Zapier Trigger Test
Bear in mind that you can select different test data sets. The following image shows how to select a different test data set:

Selecting Test Data in Zapier
Action to Make Personalized Videos, Calls to Action, and Dynamic Landing Pages
You are almost there! Now, let’s have some fun mapping the fields between your data source and our marketing automation software for personalization.
With the following steps you’ll ask the Pirsonal software to automatically create the following personalized content types:
- Personalized videos
- Dynamic and personalized landing pages
- In-video, personalized Calls to Action
These three types of content can be used together. This will help you increase customer engagement.
You can also use the same process and automation to build a personalized interactive experience with Pirsonal’s player, even when you use generic videos instead of personalized videos.
1. Choose App
Similar to how you did in the Trigger section, now it’s time to work on the Action event. An action is an event a Zap performs after it starts.
Type “Pirsonal” in the search field and select the Pirsonal app.
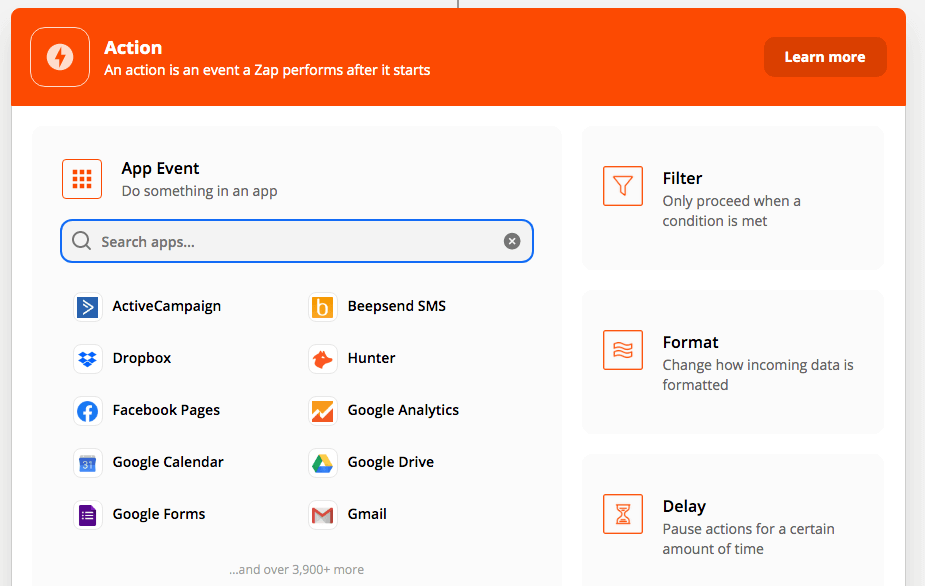
Search “Pirsonal” to find the personalized video marketing software
2. Choose Action Event
Now, select the action event from the dropdown menu and continue with the process.
The only action event available for the Pirsonal app within Zapier is “Create Personalized Video”. With this event, you can automatically data-driven videos, interactive videos with personalized Calls to Action, and personalized landing pages for the videos.
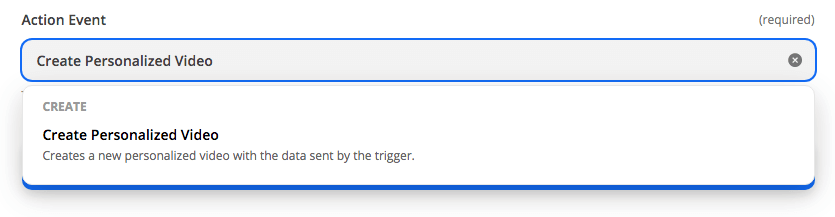
Event to Create Personalized Videos
3. Choose Account
The wizard will take you to the next step. This is, connecting your Pirsonal account to your Zapier account.
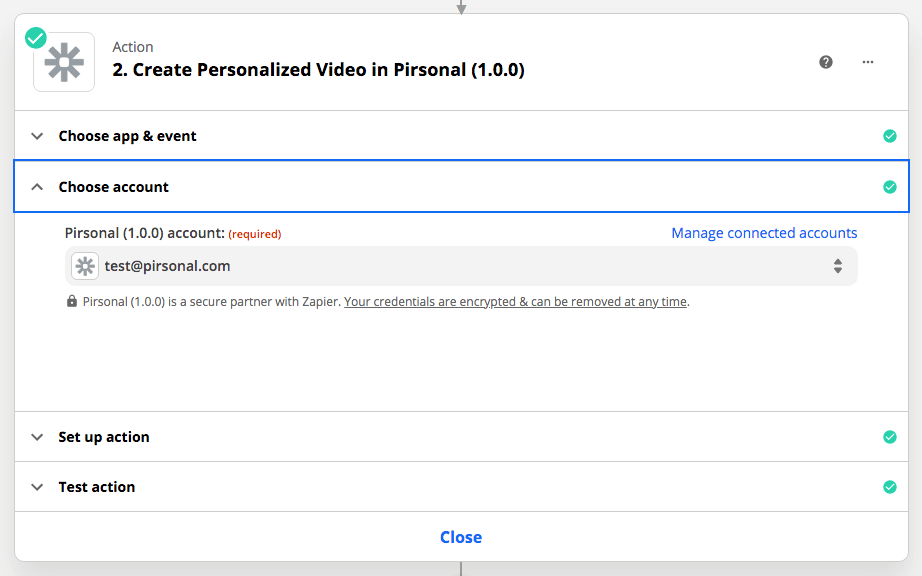
Connect Your Pirsonal Account to Zapier
If it is the first time you do this, you’ll see a “Connect a new account” button. Click there to start the connection process.
To connect your Pirsonal account with Zapier, you’ll need to provide two credentials:
- Account ID
- Account Secret
You’ll find these details in your Pirsonal’s Account Settings section. Make sure to copy this information and paste it without any blank spaces.
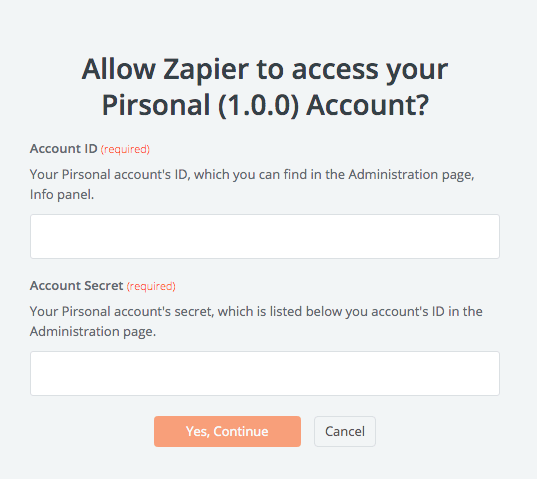
Connecting a New Pirsonal Account
4. Setup Action
It’s time to map all the necessary personalization fields within Zapier. These fields can be powered by your data source but also by the information you type right in the wizard.
Every personalized video and interactive video create with Pirsonal is powered by a template.
This is why your next step is to select the template you want to use. The dropdown menu will show templates from your account.
If the template you select will create real rendered personalized videos, below in the wizard you’ll find the dynamic fields you’ll need to map.
Below you’ll find a descriptive list of all the action fields available
Action Fields to Create Personalized Videos, Landing Pages, and Interactive Videos
- Template: Choose a personalized video template from your Pirsonal account.
- For Interactive Videos with Personalized Calls to Action: If the template you select will create interactive Calls to Action with Pirsonal Player, you’ll only have the option to add data for the personalized landing page, the Calls to Action for the videos, and define when the Calls to Action should be automatically displayed.
- For real rendered personalized videos: You’ll the dynamic fields after the Keyword fields.
- Metadata Options:
- Video Keywords: Add the tags or keywords for these videos.
- Email: Associate an email to the new personalized video. This is usually helpful when sending the video by email.
- Custom Metadata: Add any kind of metadata to your personalized videos. Automatically react when a video has been created. On the left side, you may give a name to the field (i.e. email), while on the right side you may insert a field (i.e. an email address).Want to master this tool? Watch the following video now! It shows how to get the best out of the Custom Metadata fields to empower your CRM or preferred marketing tool when creating automation from Pirsonal to the app of your choice.
- Pirsonal Pages Options:
- Landing Page Logo: Add the logo you want to show on every Personalized Video’s landing page. It has to be a URL.
- Landing Page Banner: Add the banner you want to show on every Personalized Video’s landing page. It has to be a URL.
- Landing Page iframe: Add a third-party app. For example, a contact form, a sales chat widget, or even an appointment app. It has to be a URL.
- Video Title: Add a video title. Max. length: 100 bytes. Example: “[FirstName], welcome to Sempris Hotels.”.
- Video Description: Add a video description. Max. length: 5000 bytes. Example: “Everything is almost ready for your stay in our hotel. We are just waiting for you! Watch this video now to learn more about our little surprises for all of you. The [Room Name] suite is ideal for [Number of people], especially your for your [Number of children] kids. You all will enjoy [Room Features] during [Number of Nights] wonderful nights. Remember… As a [Type of Customer] you get a [Discount Percentage] if you book [Buyer Persona Activity] before [Promo Date]. Call [Guest Experience Staff First Name] at [Tel. Number] now to get this one-time opportunity.
- Landing Page Custom CSS: Use your own CSS styles to override the default appearance of any Pirsonal Page with a Professional plan or higher.
- Pirsonal Player Options:
- Player Call To Action Type: Select the type of Call to Action you want to display in every Personalized Video. Depending on the type of Call to Action you choose, you’ll find different configuration options.
- If you select Custom HTML, you can use your own HTML as a Call to Action.
- if you select Text, you’ll also need to provide a body text, a button text, and a valid link (URL, mailto, phone)
- Call To Action Start Time: In seconds. Defines when the call to action should be displayed.
- Call To Action End Time: In seconds. Defines when the Call to Action should be hidden.
- Open Call to Action On Click: Choose true if you want to show the Call To Action when the user clicks on Pirsonal Player’s menu (three dots). This is the most common case.
- Show Call To Action When Pausing Video: Choose true if you want to display the Call to Action when the viewer pauses the video. This is the most common case.
- Pause Video With Call To Action: Choose true if you want the video to be paused when the Call to Action is displayed. This is the most common case.
- Allow To Close Call To Action: Choose true if you want the viewer to be able to close the Call to Action. This is the most common case.
- Post-roll Call To Action: This shows the Call to Action when the video ends.
- Player Call To Action Type: Select the type of Call to Action you want to display in every Personalized Video. Depending on the type of Call to Action you choose, you’ll find different configuration options.
5. Testing the Action Event
Especially the first time you do this, tests are crucial. Zapier will guide you to a test process where you’ll be requested to make a personalized video.
Once you do this, open the video link to verify that the result is the want you expect.
Every video and personalized landing page Pirsonal creates runs behind a unique ID. This is what you’ll see as a response from Zapier when you test a new video.
There are different ways to watch the video and dynamic landing page that Pirsonal created for you.
- In the standard platform, you can access any video through the following URL structure: https://vid.pirsonal.com/YOUR-VIDEO-ID-GOES-HERE
- You can access the same link through the video list in the Video or Template section, by clicking the Action menu (three dots) and clicking on “Pirsonal Pages”
- If you are creating real rendered personalized videos, you can access the source file video link through the video list in the Video or Template section, by clicking the Action menu (three dots) and clicking on “Files”. Please note that we’ll only show the video file when Pirsonal hosts the content for you, except when the files are hosted in AWS S3. You can still access the source video file URL by opening Pirsonal Pages and using your browser’s menu to get the video link. Video links follow the same structure, powered by the video ID as well.
If you are satisfied with the result, you can turn the Zap on 🙂. This means that this Zap is now ready to automatically make personalized videos, dynamic landing pages, and/or interactive Calls to Action with personalization.
Keep this browser tab opened. This will make your life easier to continue with a full automation process. This time, from Pirsonal to your CRM, management, or marketing tool of choice. Let’s see how.
Trigger from Pirsonal to Share the Video Links and Data with Your Marketing Apps
Now that you know how to personalize videos, create unique data-driven Calls to Action, and even personalized Landing Pages, let’s send data from Pirsonal to your favorite marketing software.
This will help you:
- Send emails, SMS, or even Tweets when a personalized video link is created
- Update a contact’s details from your CRM with the video or landing page URL
- Launch a marketing automation workflow
- Update a Spreadsheet
- And more.
One of the main advantages Zapier offers from a user perspective is that all Zaps share similar steps. Once you have mastered one, you have mastered most of the common use cases.
Up to this point, you’ve configured one Zap. As a reminder, a Zap is composed of a trigger and at least one action event executed based on that trigger.
In order to send data from Pirsonal to any third-party application using Zapier, you need to create another Zap.
Earlier in this article, you learned how to do this.
Because of this, I’ll share summarized steps to help you set up a new Zap that will update third-party software with data from Pirsonal.
Video Status
Every time our personalization software receives the order to create new content, the content will go through any of the following states:
- Processing
- Done
- Error
- Queued
This Zap will be triggered in two scenarios:
- When a personalized video is successfully created.
- When a video is not created because of an error.
Configuring Pirsonal’s Trigger
When you create a new Zap, the first step is to choose the app for the trigger section. In this case, choose Pirsonal.
Now choose the trigger event “New Personalized Video”.
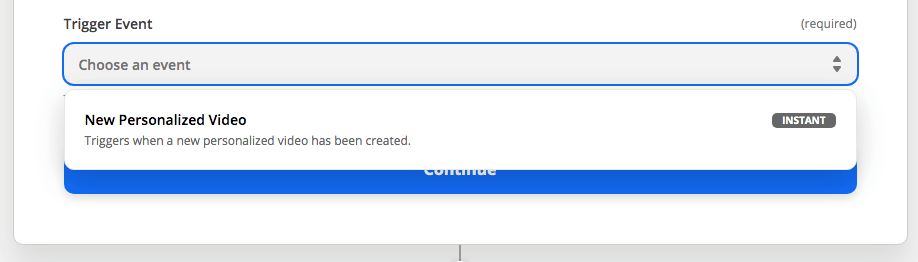
Use Pirsonal’s Trigger App to Send Video Links to Third-party Apps
Now click “Continue”. You’ll be requested to choose your Pirsonal account. Since you have already connected your Pirsonal account to Zapier, you’ll find it in the list. Please select your account and continue with the process by clicking “Continue”.
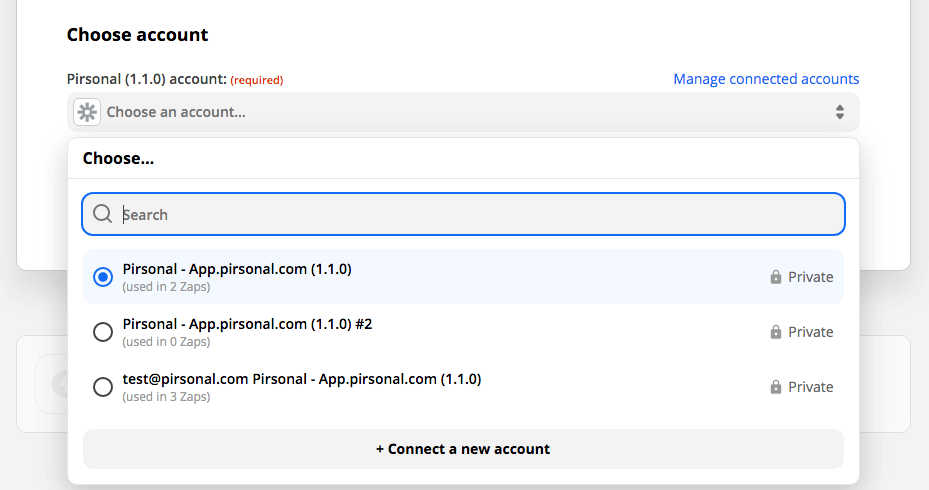
Choose Pirsonal Account
Continue the process to the next screen. You’ll see a webhook URL for Pirsonal.
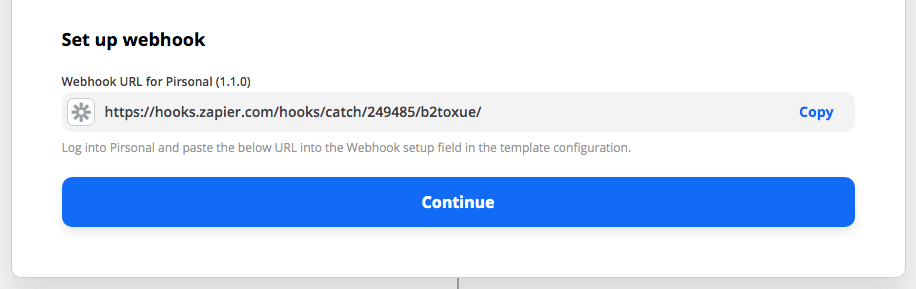
Webhook Example from Pirsonal and Zapier
Webhooks are basically user-defined HTTP callbacks (or small code snippets linked to a web application). These callbacks are triggered by specific events.
Think about it as a notification system between apps.
We love webhooks because they run in real-time, which is the way your marketing automation works, right?
With Pirsonal, the webhook will be triggered when the video status changes to any of the following scenarios:
- done
- error
Whenever that trigger event occurs in Pirsonal, the webhook sees the event, collects the data, and sends it to the URL specified by Zapier in the form of an HTTP request.
Adding the Webhook to Your Pirsonal Template or Project
It’s time to add the webhook to your template or project in Pirsonal. Log into Pirsonal and paste the URL into the Webhook setup field in the template or project configuration.
Depending on the platform version you are using and the type of template or personalization project you are working on, there are different ways to do this:
Pirsonal Editor
If you are using Pirsonal Editor, follow these steps:
- Go to My Templates
- Find the template you want to update with the Webhook
- Click on the Action menu (three dots)
- Click on “Edit with Pirsonal Editor”
- Go to the Details tab
- Click on “Template Information”
- Add the webhook URL in the URL field
- Save the template
Pirsonal Player (Interactive Video Player) and Pirsonal Script (Legacy)
If you are using Pirsonal’s interactive video player only or Pirsonal Script, follow these steps:
- Go to My Templates
- Find the template you want to update with the Webhook
- Click on the Action menu (three dots)
- Click on “Edit with Pirsonal Script” if you are using the legacy Editor or “Pirsonal Player” if you created a project for our interactive video player with personalization
- Add the webhook URL in the URL field
- Save the template
Testing the Trigger Event From Pirsonal
To test this trigger with the webhook you just added to your Template or Project, continue with the steps described by Zapier.
Zapier will ask you to create a new personalized or interactive video to retrieve the video data so that you can use it with your Action Event later.
Remember that earlier I suggested leaving the previous Zap that connects with Pirsonal to create the content automatically opened in the browser?
Now it’s time to use that tab again. In that tab, go to the test section and test a new video again. This will create new content but this time the data will also be sent through the webhook you just added to your Template or Project.
Once you’ve done this, Zapier will receive sample data that will help you map your Action section to create an automation process with video.

Webhook Test with Zapier and Pirsonal
In the response, you’ll find all the metadata associated with the video you’ve just created. This includes:
- Technical information like processing time, video status, and more
- Basic metadata information like video title, description, and keywords
- Custom metadata for CRM and marketing like first name, last name, email, and your custom information.
If you are happy with the result, continue with the Action Event.
This will help you create a smooth process with Pirsonal’s marketing automation software for personalized multimedia content.
For example, because Pirsonal created a personalized video from a form submission, Hubspot is updated to send an email to the new marketing lead.
It’s time to make your saturated audience react. Video is the type of content they all pay attention to.
Pirsonal helps you make relevant personalized multimedia content in a flexible way that adapts to your marketing game so that you can evoke a reaction from each one of them, at scale and automatically.